Today I'd like to share with you a technique that I just LOVE to use these days.
The technique is how to use one of the Little Scraps of Heaven svg files in SCAL3 (Sure Cuts a lot v. 3) and make it a card.
In the past I have made the following with this technique:
In the below picture I used files from the "Spooky Eyes" collection.

For this everyday card I used the "Scalloped Shapes file"

I used the "Bassinet" file for this card

I used the rocket in the "To the Moon" pattern collection for this card

I used the "Crab" file for this card

As you can see .. once you master the technique the possibilites are really endless.
So .. here goes ...
For my tutorial I am going to make a birthday card out of the "Valentine Cupcake" pattern set.

For this tutorial you will need:
1- Any SVG file (preferably one from Little Scraps of Heaven Designs)
2 - Sure Cuts a lot software (I use version 3 but I am confident you can follow along with version 2)
3- Cutting machine that can cut svg files and is compatible with SCAL. I use the Silhouette Cameo.
STEP1: Open your svg file in SCAL

STEP 2: Resize and eliminate or duplicate any pieces that you want. I've deleted the hearts as I will be making this into a Birthday card and do not need them.

STEP 3: Move the pieces together to build your image.

STEP 4: Copy the image to make an exact duplicate and place next to each other.

STEP 5: Use the "Flip Image function to turn one of the images. You will now have a set of mirror images.

STEP 6: Move the images so that they now touch where you want your fold to be.
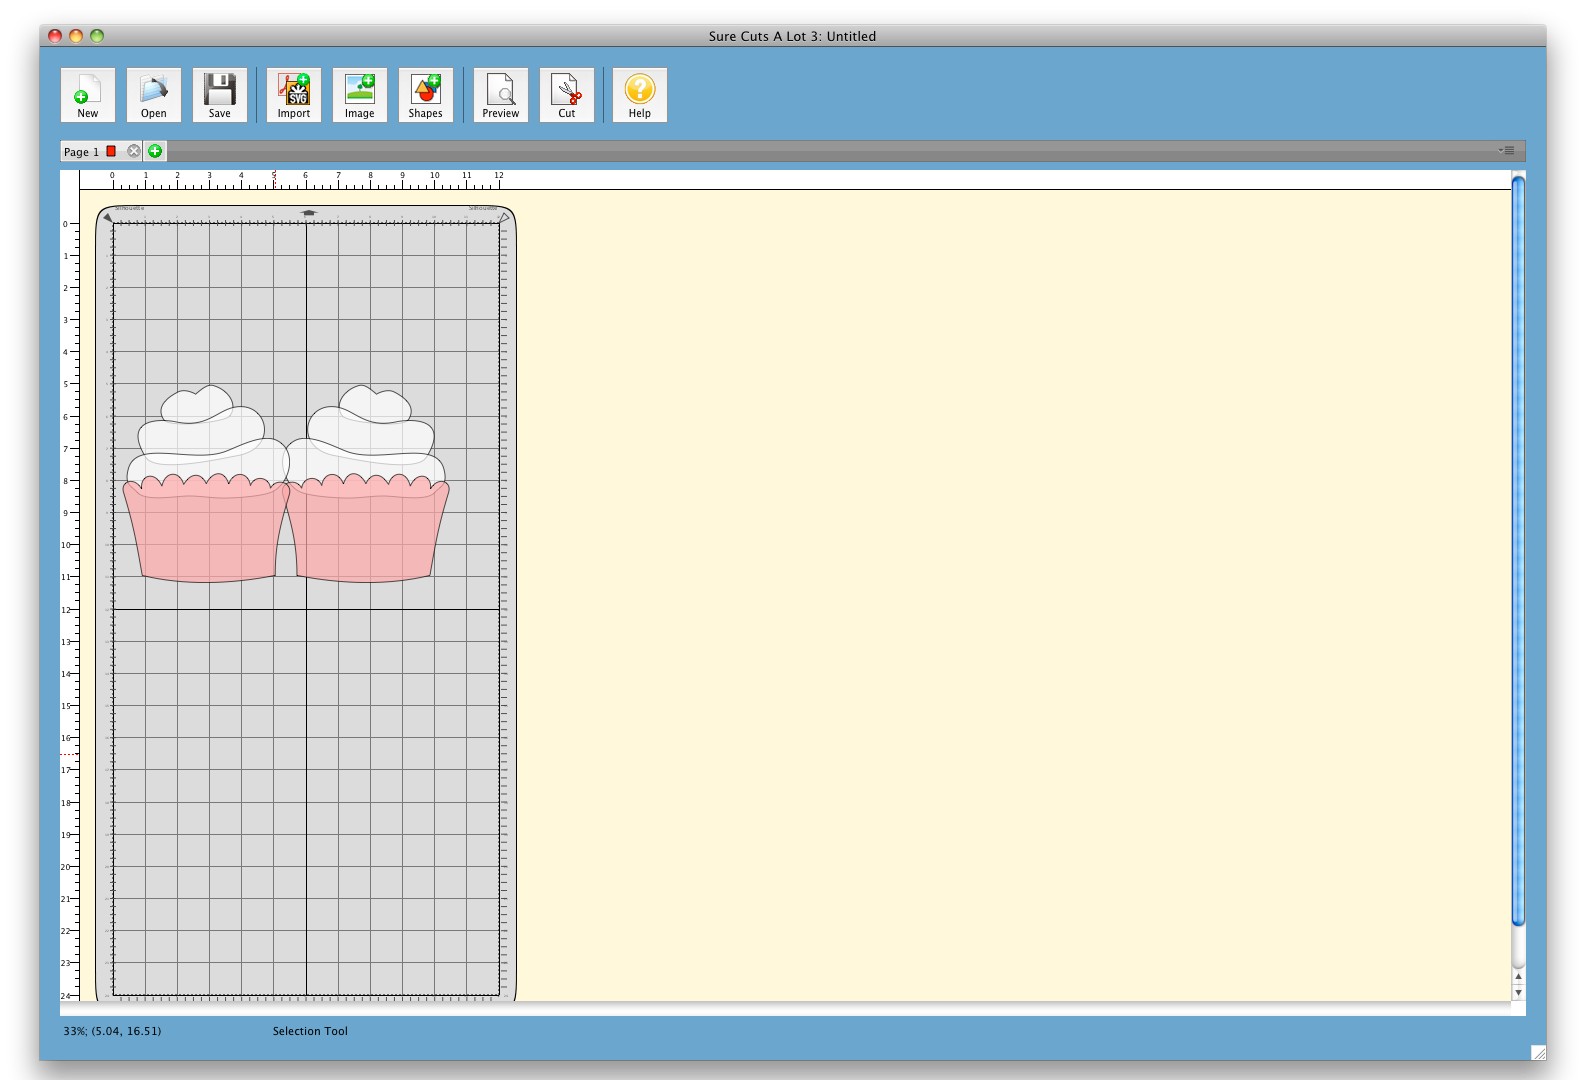
STEP 7: Select all images shown on your screen and use the "weld" function to fuse them together.

STEP 8: "Preview" your cutting file to ensure that the images that you have ready will be cut as you would like your card to look.

STEP 9: Place your paper color of choice at the correct location on your mat and cut your newly created card.

STEP 10:
Feel free to cut any additional piecings that you want at this point to give that great layered look.
I've cut some additional frosting and a paper wrapper.

At this point, it's all up to your imagination ... add glitter, ribbon, gems, etc and make the creation your own!

I hope that you've found this tutorial helpful!
Have a great weekend!