Image Hosted At MyspaceGens
Showing posts with label paper trey ink. Show all posts

Monday, December 31, 2012

New years eve celebration

I hope everyone is gearing up for a fun New Year's Eve!

My family is more of a stay-in kinda family rather than hitting the town.  We plan on ordering take out and then making some yummy homemade carmel popcorn in the evening.   We may even get crazy and go and see a movie in the early afternoon .... TALK about CRAZY! :)

Be sure to stop by the Little Scraps of Heaven Design team blog to see all the fabulous project my fellow teammates have shared for you on this fabulous Monday.  We'd love to see any wonderful creations that you have made this week to kick off the New Year.  Be sure to share them on the Little Scraps of Heaven Facebook Fanpage.  Also, be on the lookout because next week the LSHD DT is kicking off our challenges again.  There will be layout sketch challenges, card sketchs and much more.  Remember that you can't win if you don't enter!  I hope to see all of your creations soon!


To close out 2012 I've created this fun little New Year's Celebration card.  


I've used the following items to create this card:
1. Paper piecing patterns from Little Scraps of Heaven Designs - New Years Bears
2.  Twine from Trendy Twine - Orangesicle
3.  Clearsnap Colorbox Chalk inks
5. Solid Shimmer Cardstock from DCWV


Monday, December 17, 2012

The Little Drummer Boy

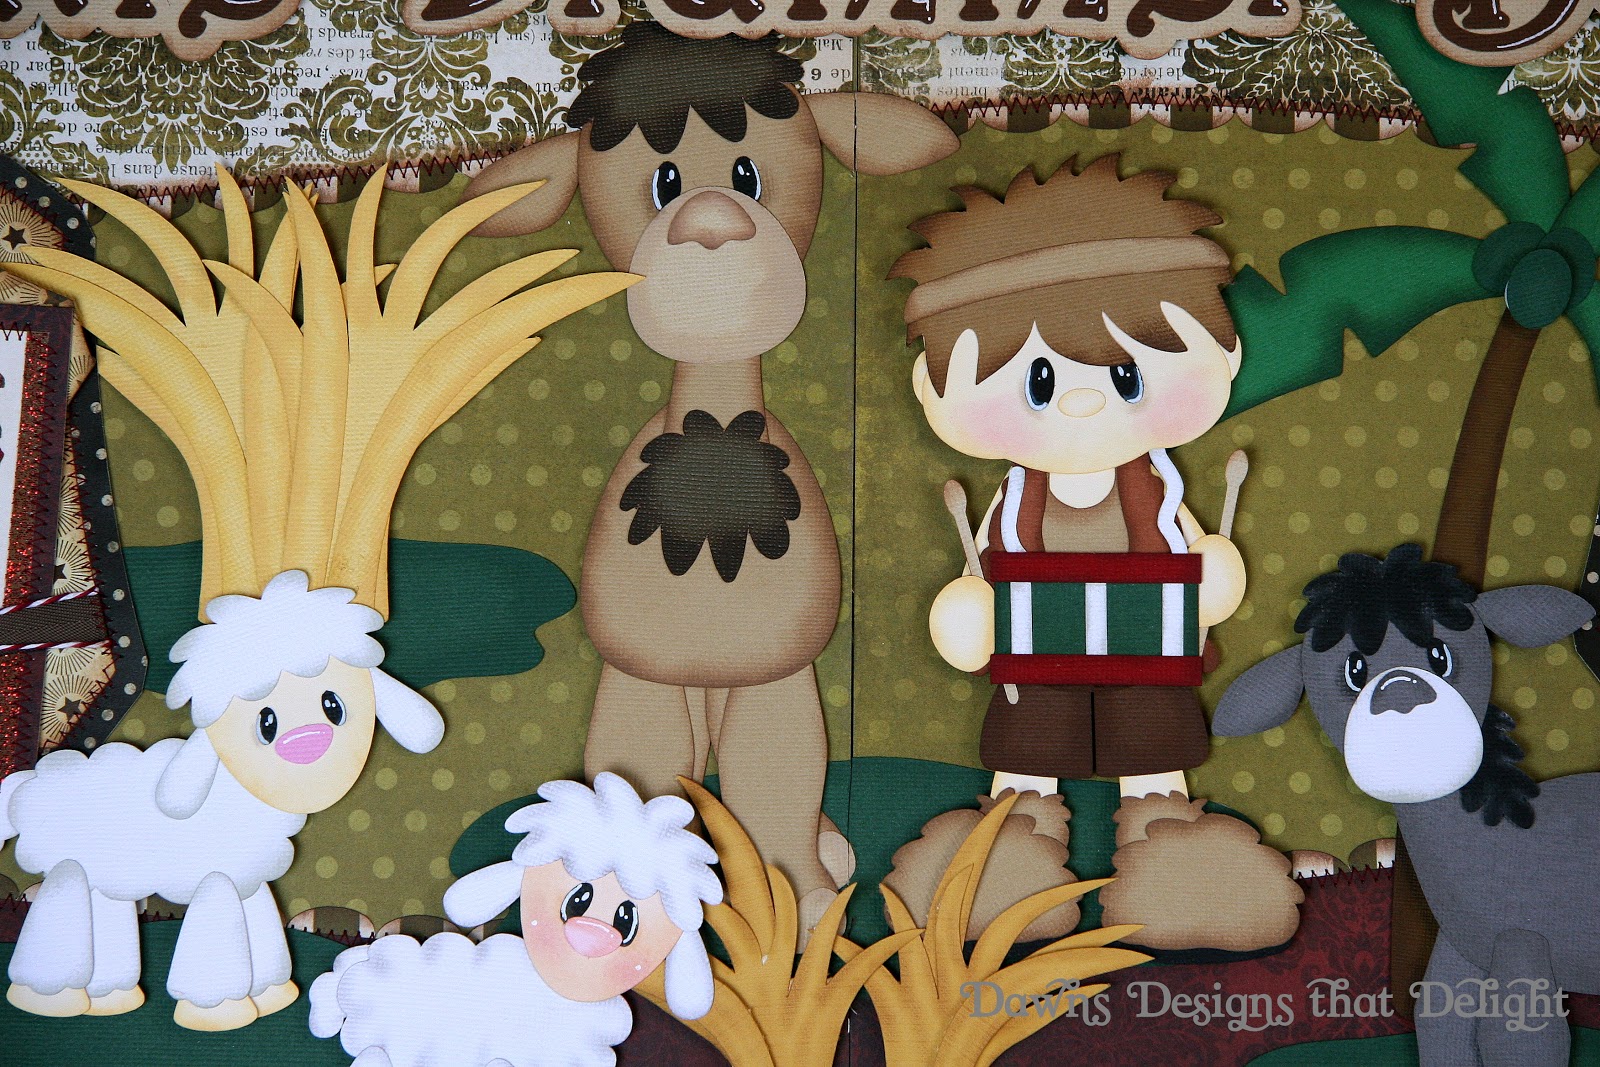
As Christmas approaches I am really enjoying with new Christmas files from Little Scraps of Heaven Designs.  This week I've chosen to work with the "Little Drummer Boy" paper piecing file.

Feel free to share your project for the week and have a chance to win a prize at Little Scraps of Heaven Designs.  For all the details on the Design team challenges, please click HERE.


Here is the full layout

The left page

The right page

Close up of Camel and Drummer Boy

The Drummer Boy

Close up of Donkeys

Close up of mat with pull out tags 

I've used the following item sto complete this layout:
1. Paper piecing patterns from Little Scraps of Heaven Designs (Little Drummer Boy)
2. Twine from Trendy twine in Peppermint stick.
3. Recollections patterned paper
4. Solid cardstock by American crafts
5. Clearsnap Colorbox chalk inks
6. Grosgrain ribbon from Paper Trey ink

If you have any interest in purchasing this layout, please click HERE for additional information.

Have a wonderful week!


Tuesday, November 20, 2012

Lego Card

Pinterest is totally inspiring!

There are so many talent crafters, bakers, chefs out there that I would never have stumbled upon if it had not been for pinterest.

I've already tried countless recipes, a handful of crafts, used some storage organizing ideas and LOADS of homemade cleaners for around the home!

I have to say I have loved almost each and every item that I've actually tried..... and have I mentioned that I have thousands of things to try on my to do list?  :)

Today my post is a project that I created that I stumbled upon from Pinterest.
It was last minute and I realized I wanted to make a card for a birthday party that my son's were invited too.   The little boy was turning 5 ... and hey, what better way to celebrate than to make him a fantastic card?

Well .. if you know me .. and have seen my layouts  .. you know that they can get a bit ... ahem .. detailed.  I just did not have the time for that today .. it had to be quick, it had to be cute, and it had to be easy.

A quick search on Pinterest brought me to HERE.  It's an image that someone posted on Splitcoaststampers.com.  I wish I could point you to the original artist's blog .. but unfortunately this link will have to do as I could not find any other way to credit the original person.

And HERE is the SUPER fast, SUPER cute, SUPER easy card that I threw together.  Start to finish was maybe 15-20 minutes ... not bad for me.

I hope that this inspires you to throw something handmade together for those you love ... even if it is last minute.


For this project I used the following:
1. Pinterest link!
4. Twine from Trendy Twine in Peppermint Stick


Thursday, August 23, 2012

How to create a card from a LSHD svg file

Good morning all,
Today I'd like to share with you a technique that I just LOVE to use these days.

The technique is how to use one of the Little Scraps of Heaven svg files in SCAL3 (Sure Cuts a lot v. 3) and make it a card.

In the past I have made the following with this technique:

In the below picture I used files from the "Spooky Eyes" collection.

For this everyday card I used the "Scalloped Shapes file"

I used the "Bassinet" file for this card

I used the rocket in the "To the Moon" pattern collection for this card

I used the "Crab" file for this card

As you can see .. once you master the technique the possibilites are really endless.

So .. here goes ... 

For my tutorial I am going to make a birthday card out of the "Valentine Cupcake" pattern set.

For this tutorial you will need:
1- Any SVG file (preferably one from Little Scraps of Heaven Designs)
2 - Sure Cuts a lot software (I use version 3 but I am confident you can follow along with version 2)
3- Cutting machine that can cut svg files and is compatible with SCAL.  I use the Silhouette Cameo.

STEP1:  Open your svg file in SCAL

STEP 2: Resize and eliminate or duplicate any pieces that you want.  I've deleted the hearts as I will be making this into a Birthday card and do not need them.


STEP 3:  Move the pieces together to build your image.


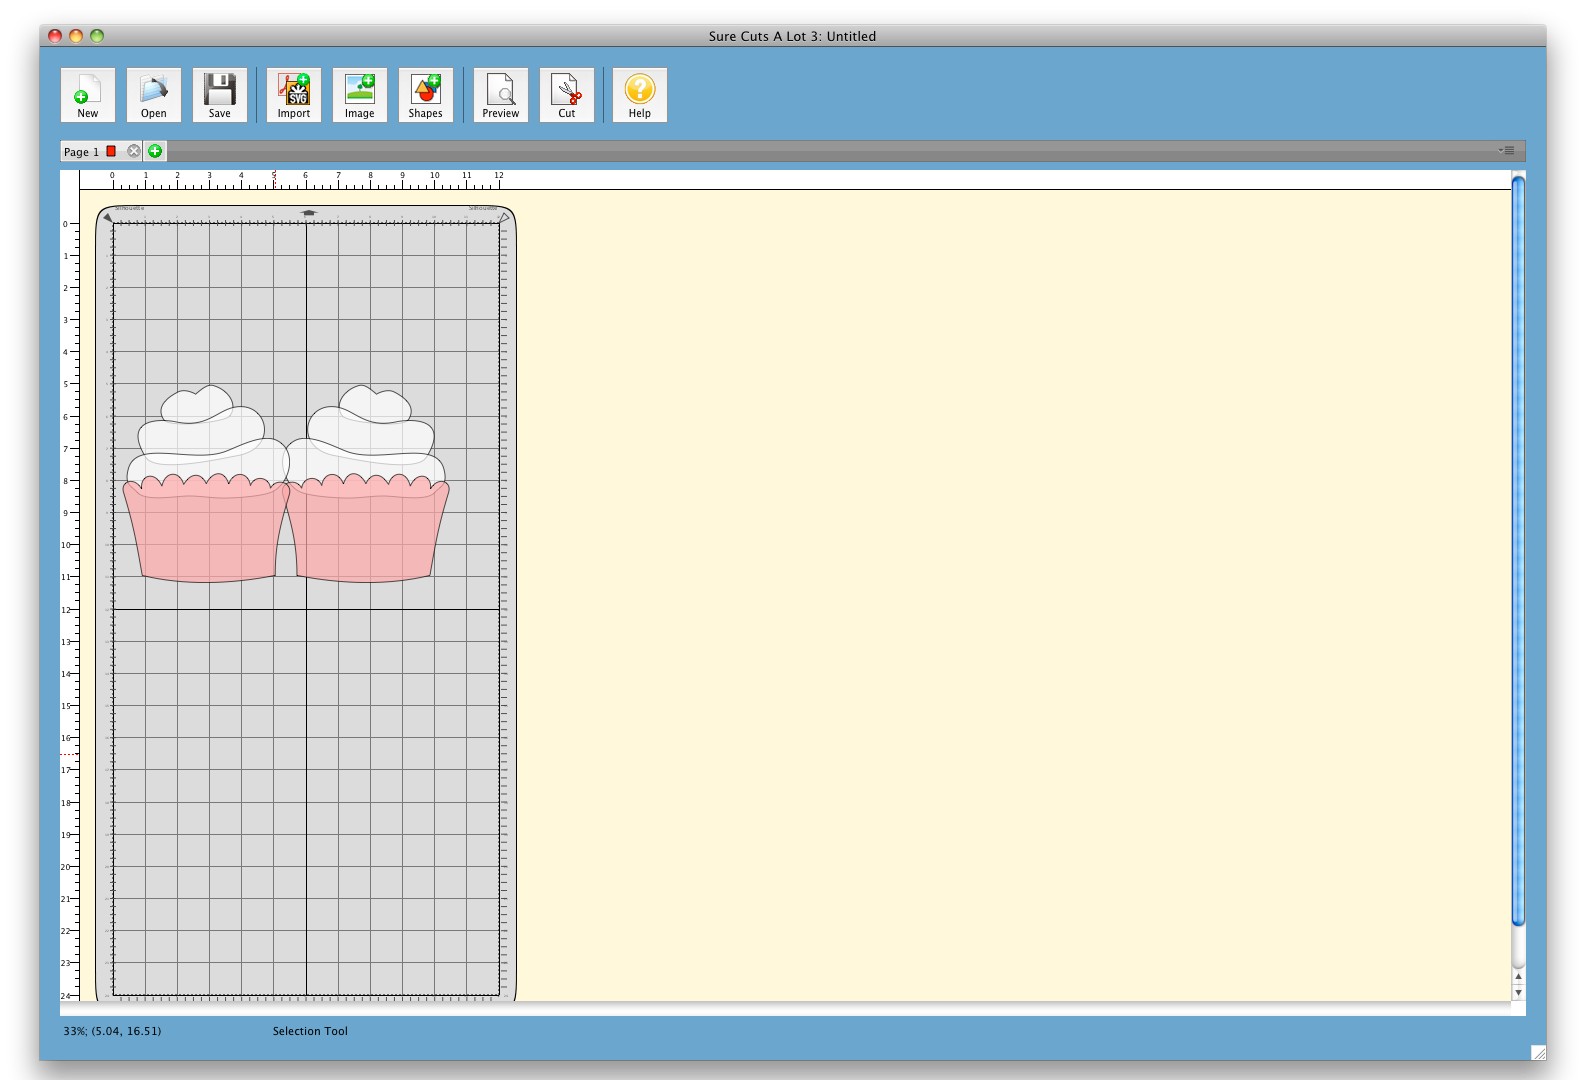
STEP 4:  Copy the image to make an exact duplicate and place next to each other.


STEP 5:  Use the "Flip Image function to turn one of the images.  You will now have a set of mirror images.


STEP 6:  Move the images so that they now touch where you want your fold to be.


STEP 7:  Select all images shown on your screen and use the "weld" function to fuse them together.


STEP 8:  "Preview" your cutting file to ensure that the images that you have ready will be cut as you would like your card to look.


STEP 9:  Place your paper color of choice at the correct location on your mat and cut your newly created card.


STEP 10:
Feel free to cut any additional piecings that you want at this point to give that great layered look.
I've cut some additional frosting and a paper wrapper.


At this point, it's all up to your imagination ... add glitter, ribbon, gems, etc and make the creation your own!


I hope that you've found this tutorial helpful!  
Have a great weekend!


Related Posts Plugin for WordPress, Blogger...